Create a Telegram Bot via Telegram Channel
Syn.Bot.Channels library comes with a TelegramChannel class that is tailored for rapid Telegram Bot deployment based on SIML and OSCOVA. The class takes care of the following.
- Automated User name part extractions (Name, First Name, Last Name and Username)
- Handling of messages received by Telegram Bot by directly generating responses from the SIML knowledge-base or OSCOVA Dialogs.
- Service Timer - adds support for internal bot timer and
Lateadapter in SIML Projects and delayed respose support in OSCOVA. - Handling of callback queries.
- Auto construction of Telegram's Inline Keyboard when formatted
Hintvalue is received. - Adds custom implementation of
ISuggestionFormatterfor Example processing withinHintelement in SIML. - Support for Parse Mode and Keyboard Alignment selection.
Overridden User Variables
| Variable Name | Description |
|---|---|
Name or FirstName |
Returns the first name of Telegram user. |
| LastName | Gets the last name of the Telegram user. |
| Username | Gets the User ID of the Telegram user. |
Creating a Console Application
Requirements
- .NET Framework 4.6.1
- Visual Studio 2019 Community Edition or above
- Syn Oryzer Studio 2.0 or above.
Tip
As an alternative you may also download the TelegramSampleProject from our GitHub repository.
As the backend knowledge-base processing part of a Bot is usually held in a server environment, we will create a Console application to keep memory usage to its bare minimum.
In this tutorial we'll use Visual Studio 2017 Community Edition to create a Console C# project that will allow us to create an SIML based server which would power a Telegram Bot.
- Start Visual Studio
- Click on File, select New and then choose Project
- Under Visual C# select Console Application.
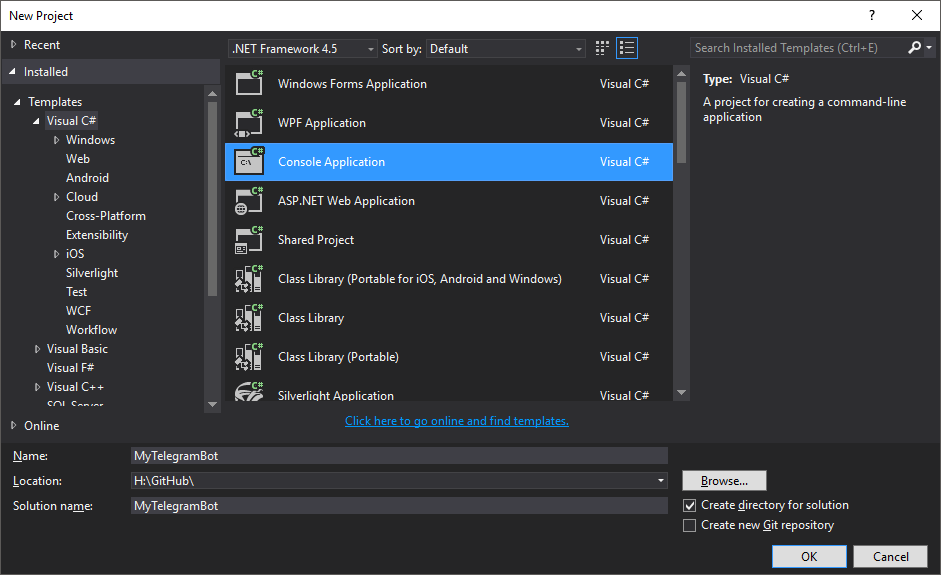
Name your project MyTelegramBot and choose OK
Once the project has been successfully created. On the toolbar select Tools, point to NuGet Package Manager and select Package Manager Console.
- Type Install-Package Syn.Bot.Channels and press Enter
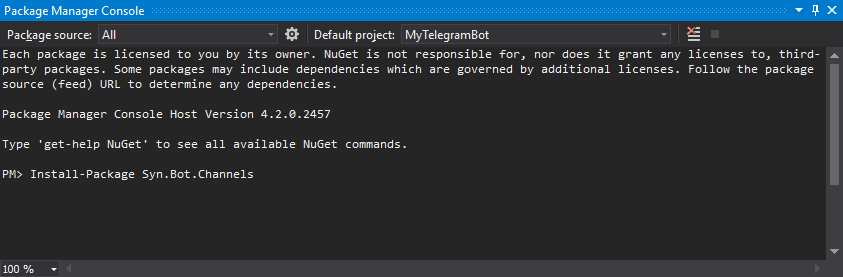
The Syn.Bot.Channels library along with its dependencies will now be referenced in your project.
Creating a Telegram Bot
To obtain a Telegram Bot Access Token
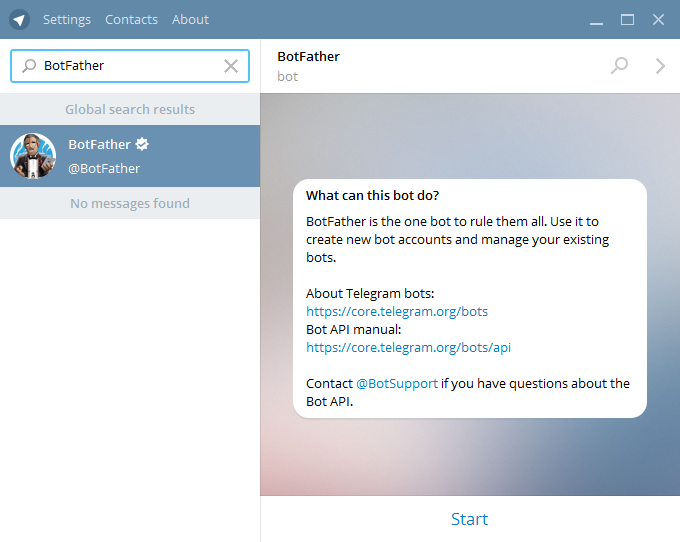
- Download Telegram to your Desktop or Mobile from Telegram
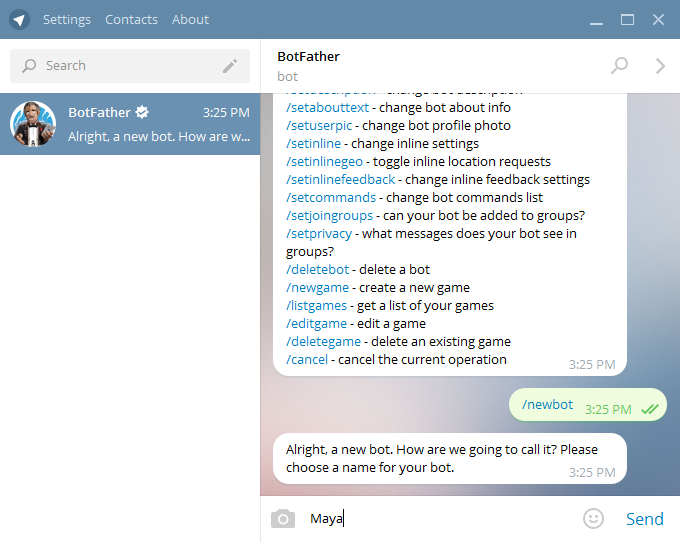
- Search for BotFather and then click on Start.
- Type /newbot
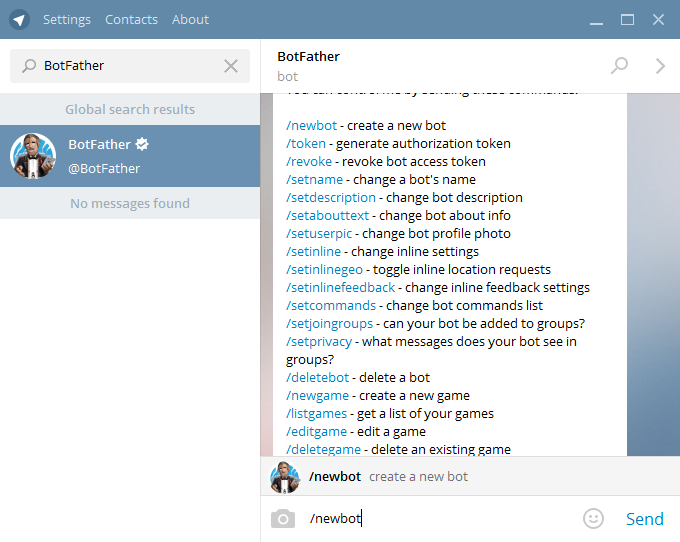
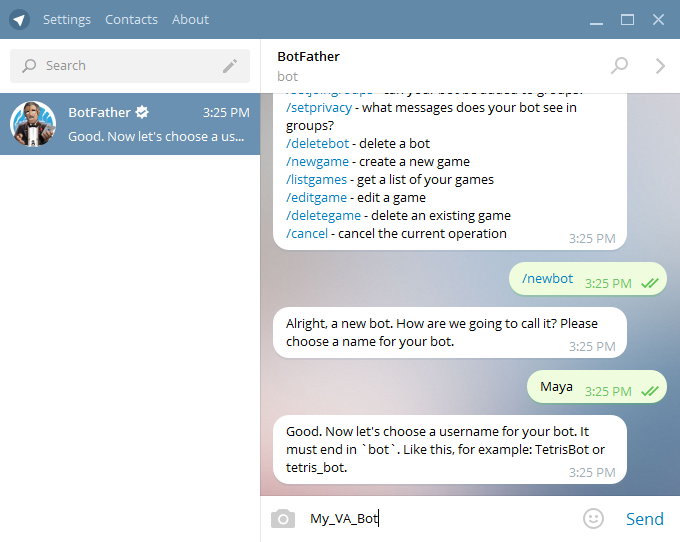
- Enter a display name for your bot. In our example we've used Maya
- After you've specified the bot name, enter a unique Bot name. You can use _ as separators. For this tutorial we've used the name My_VA_Bot as the Bot name.
- After that you'll be presented with the HTTP Access Token.
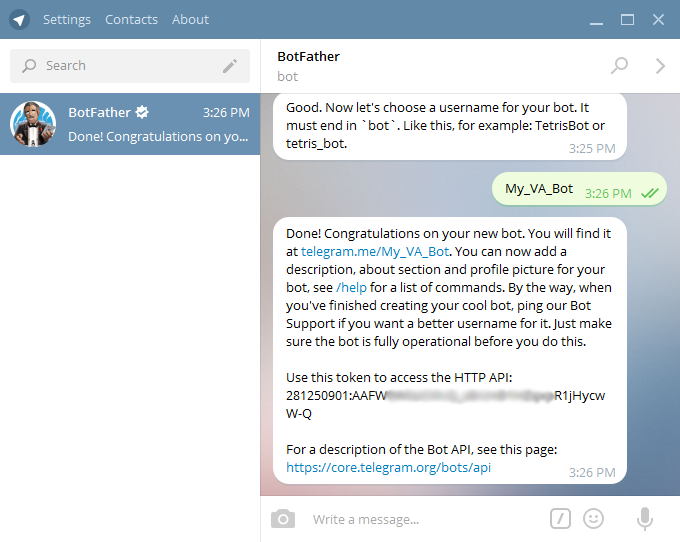
- Copy the HTTP API access token as shown below.
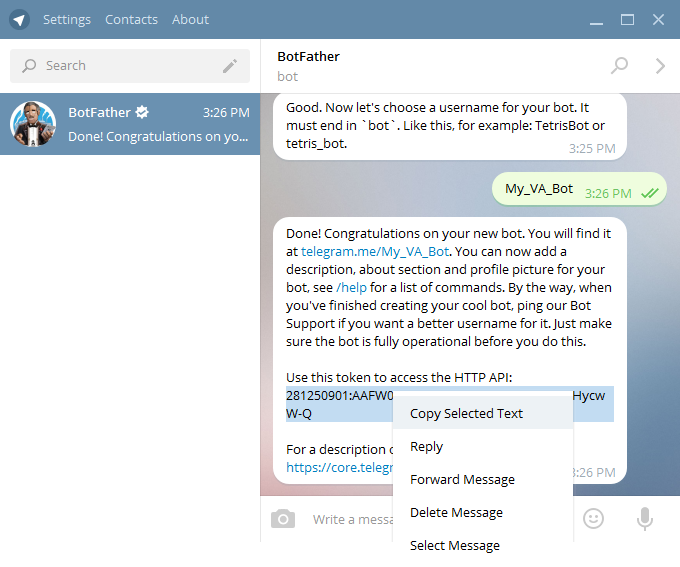
You have now successfully created a Telegram Bot and acquired its Access Token.
Coding
For testing our first response we'll need to first create a dialog. We'll call it HelloBotDialog. Add the following OSCOVA dialog to your project.
class HelloBotDialog : Dialog
{
    [Expression("Hello Bot")]
    public void Hello(Context context, Result result)
    {
        result.SendResponse("Hello there! I am Oscova.");
    }
}
Open the Program.cs file and paste the following code within the Main static method.
var telegramChannel = new TelegramChannel<OscovaBot>("TELEGRAM_BOT_ACCESS_TOKEN", new OscovaBot());
telegramChannel.Bot.Dialogs.Add(new HelloBotDialog());
telegramChannel.Bot.Trainer.StartTraining();
telegramChannel.Client.StartReceiving();
OscovaBot.Logger.LogReceived += (sender, args) =>
{
    Console.WriteLine(args);
};
Console.WriteLine("OSCOVA Bot is now Online.");
Console.WriteLine("Type \"Hello Bot\" in your Telegram client to check response.");
Console.ReadLine();
telegramChannel.Client.StopReceiving();
Replace
TELEGRAM_BOT_ACCESS_TOKENwith the Telegram Bot Access Token.
Testing the Channel
- To start the Console application press F5.
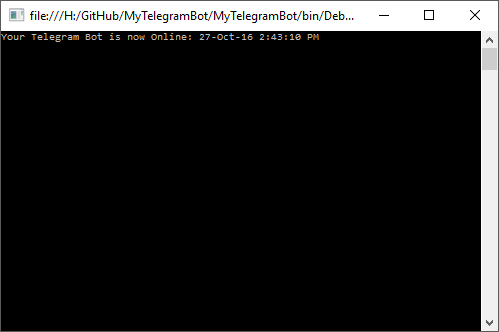
Your TelegramChannel based Telegram Bot is now online. You may now chat with your bot on Telegram.
Note
The TelegramChannel is designed to be launched in a Server (either Windows or Linux) environment where the internet speed is higher than typical household broadband connections.