Create a Discord Bot via Discord Channel
Starting with the release of Syn.Bot framework V3, Syn.Bot.Channels has added support for Discord. The DiscordChannel class is designed to be extremely user-friendly as we wanted to ensure that the learning curve was kept at a minimum level for gamers to built and deploy their bots easily.
The channel provides the following functionalities.
- Redirects messages sent to the Discord Bot to Syn Bot framework.
- Generated response by Syn Bot is sent back to respective Discord User
- Messages can contain Texts, Quick replies, images and cards.
- Reconnect the Bot in case connection is temporarily lost.
Overridden User Variables
| Variable Name | Description |
|---|---|
| Username | Gets the User ID of the Discord user. |
Creating a Console Application
To create a Console application in Visual Studio following the steps given below.
- Start Visual Studio 2019 or above
- Select Create a new project and choose Console App
- Click Next
:video videos/create-console-app.mp4
- Name the project DiscordChannelSample and choose OK.
Note
You can also download the sample Discord Bot project by visiting the Syn Bot Channels Github Repository
Getting Bot Token
In order to host a Discord Bot, the DiscordChannel class requires the Bot Token. To get the bot token please follow the steps below.
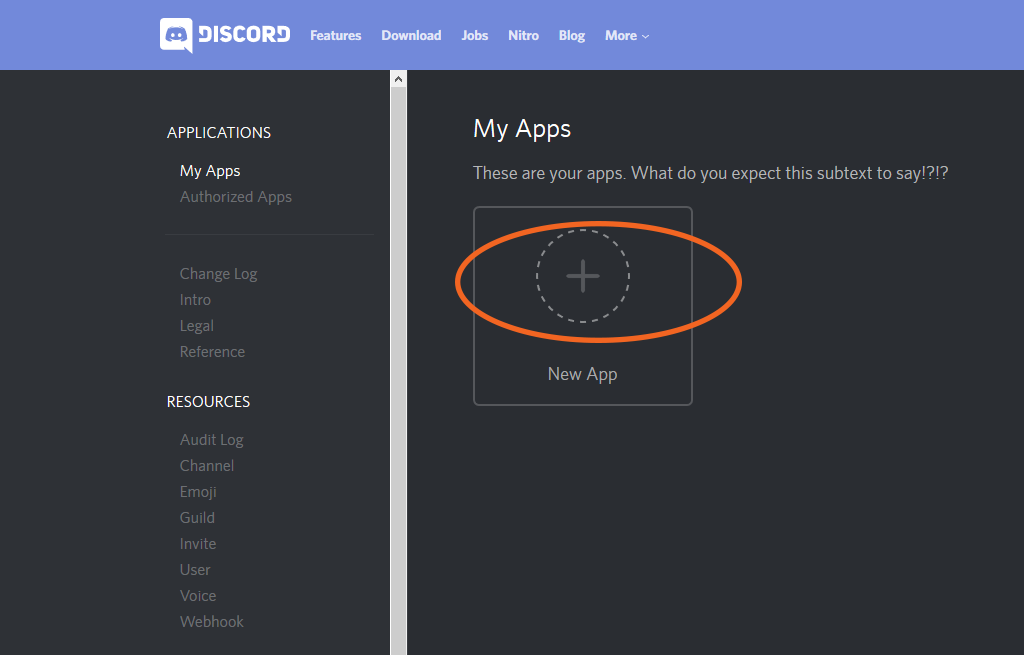
Click on New App and specify an application name say MyAwesomeBot in our case and hit the Create App button.
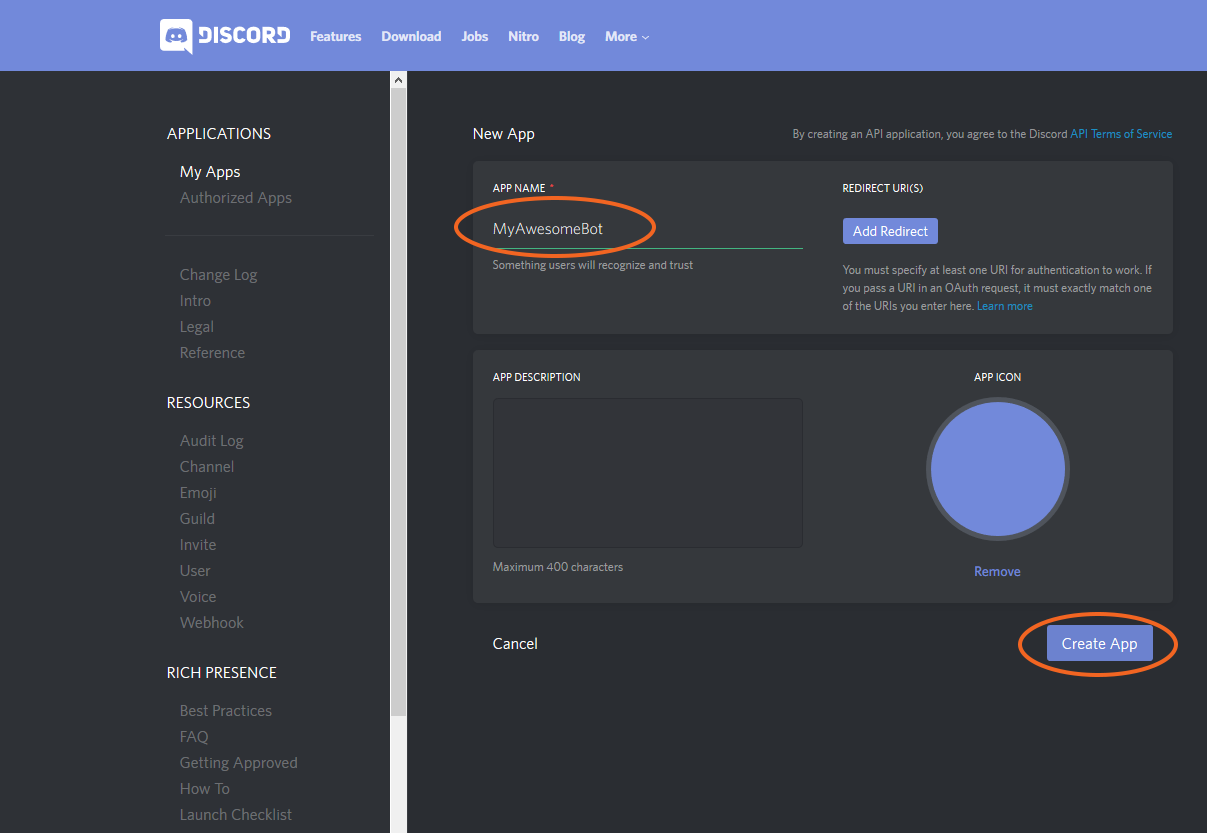
Once you click the Create App button your application will be created and you will see a page similar to something as seen below.

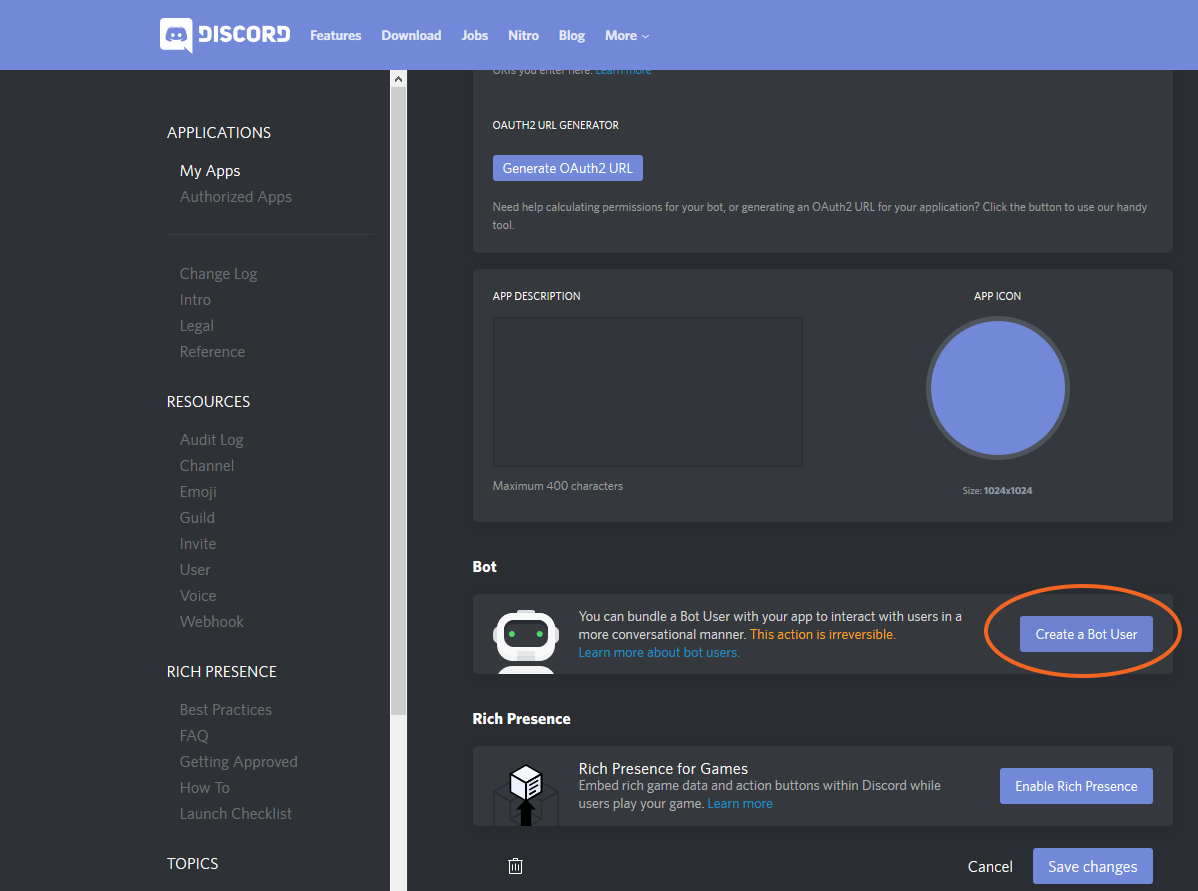
Now scroll down the page and you will find the Bot section. Click on the Create a Bot User button.
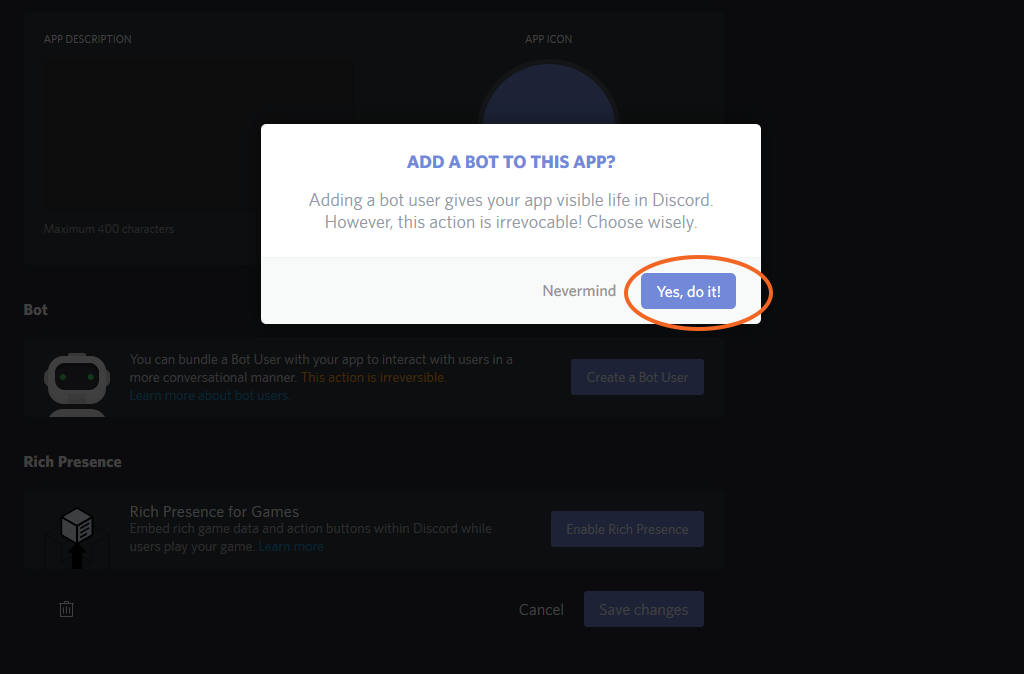
You will get a confirmation box, click on Yes do it!.
Your Bot User is now created and a Token is made available. Click on click to reveal to get the Bot Token ID.
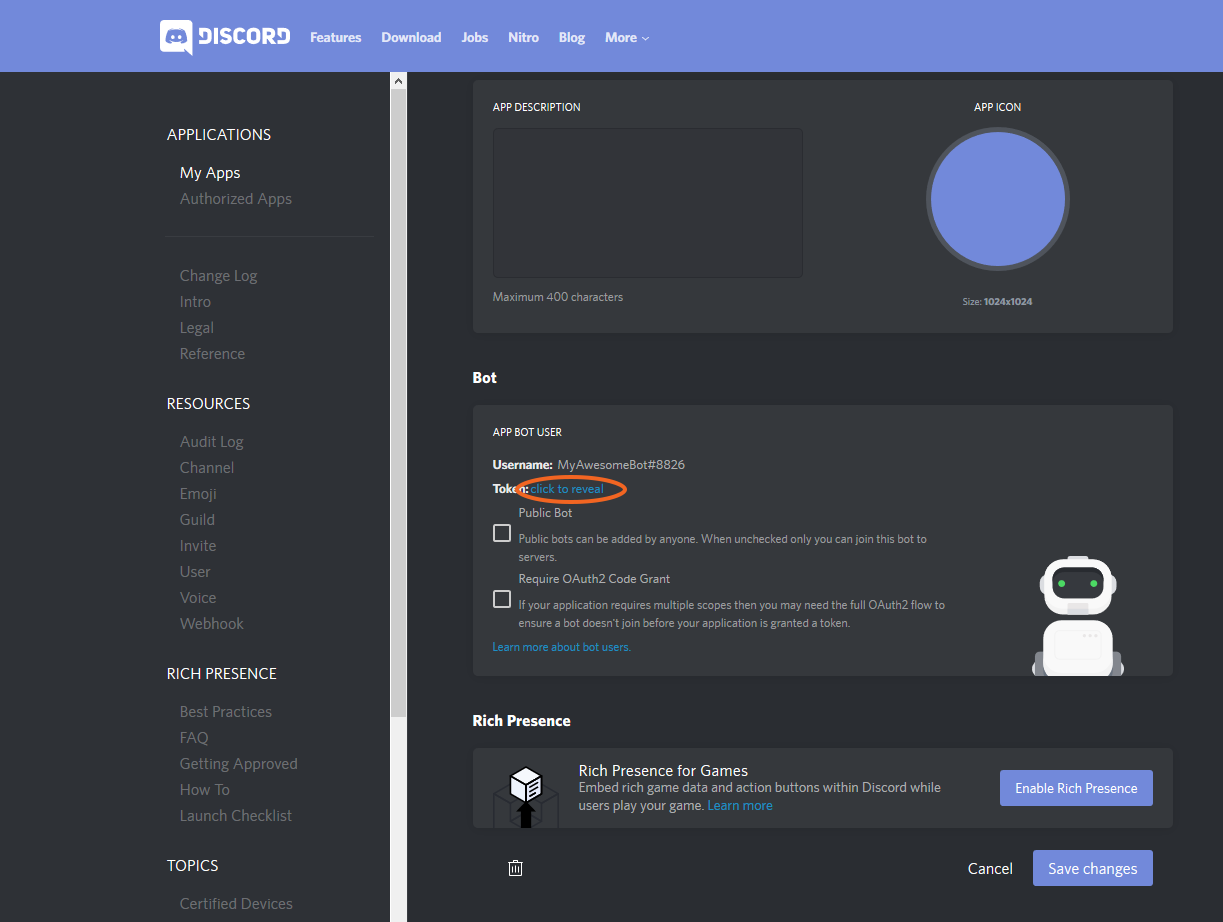
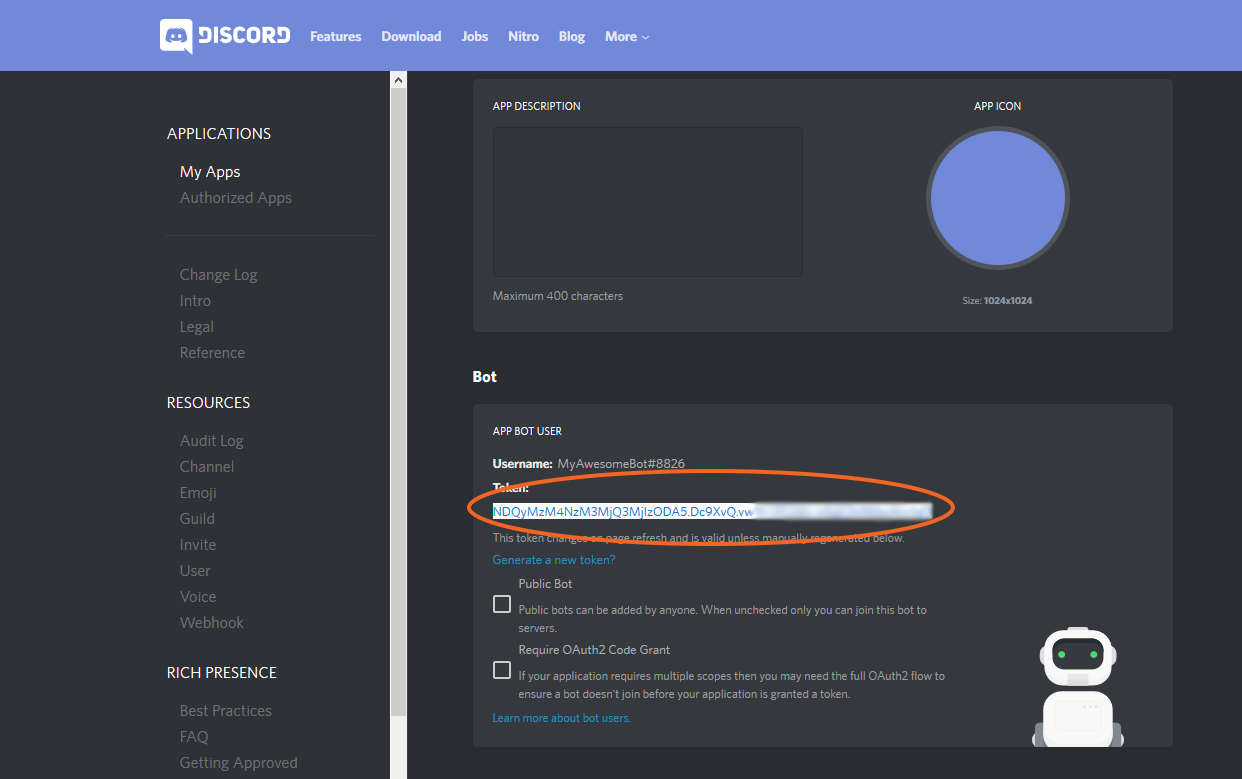
Copy the revealed token and save it as we will be using it with
DiscordChannelclass.
Important
Never share the bot token with anyone and also ensure the token is not shared publicly in case you are working on a public repository. If you are working on a public repository, you are encouraged to save the token as a system Environment Variable.
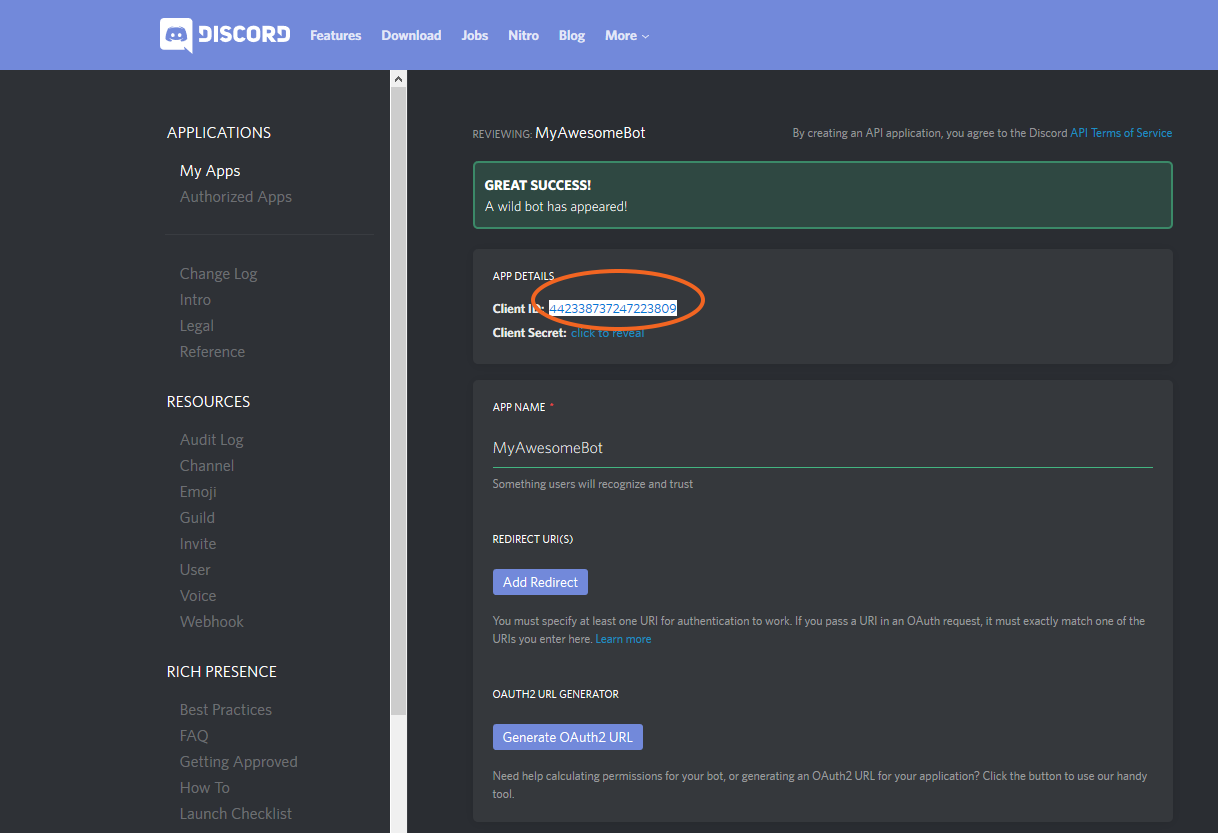
Now that you have acquired the Bot Token we will need to authorize the application. For this, scroll back up and copy the Client ID and replace the CLIENT_ID_HERE in the URL https://discordapp.com/oauth2/authorize?&client_id=CLIENT_ID_HERE&scope=bot&permissions=0 with the copied value and paste it in the Browser's URL Bar.
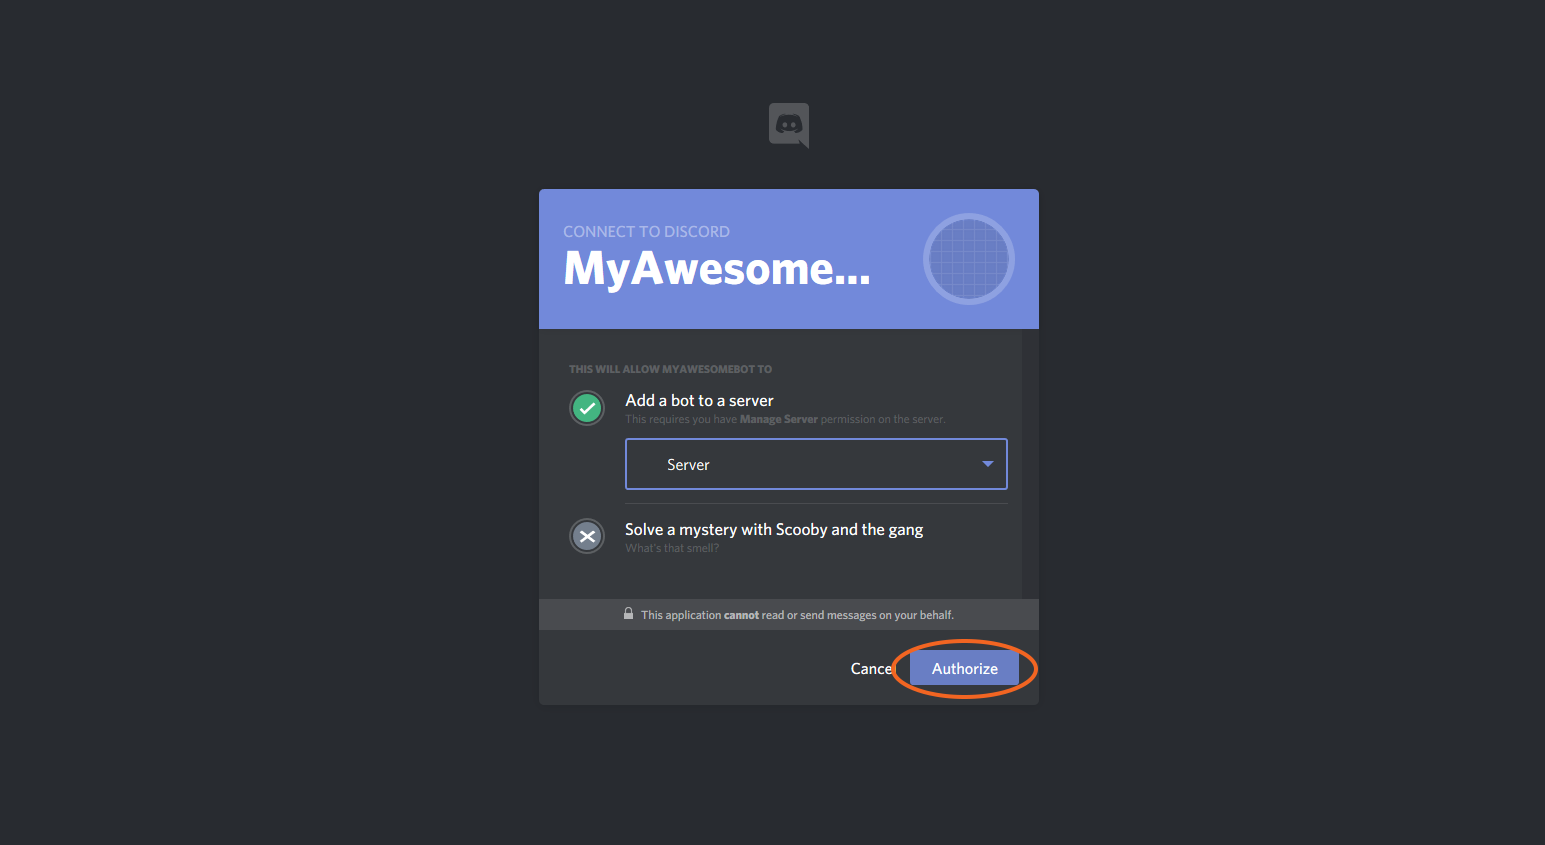
You will be asked to add the bot to a server. Select your existing server and click on Authorize
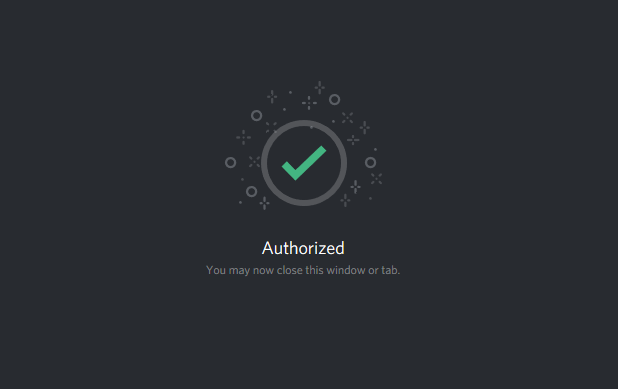
You will finally see a page asking you to close the tab. So do just that.
Creating a Discord Channel
Now that we are ready with the bot token from Discord, we can finally begin creating our Discord bot by first creating an instance of OscovaBot and ChannelTestDialog.
Import Syn.Bot.Channels
To import Syn.Bot.Channels framework to your current project you can:
- Right click Reference in Solution Explorer
- Choose Manage NuGet Packages...
- Select Browse and type
Syn.Bot.Channels - Click on Install and the package will be installed to your project.
Coding
The ChannelTestDialog is an additional class that helps you test responses in any channel by providing pre-built Oscova intents. The class is available under the namespace Syn.Bot.Channels.Testing.
In the code below we first create an instance of OscovaBot and then add a new instance of ChannelTestDialog.
var oscovaBot = new OscovaBot();
oscovaBot.Dialogs.Add(new ChannelTestDialog());
oscovaBot.Trainer.StartTraining();
Next we'll create an instance of DiscordChannel by providing the previously created Oscova Bot object and replacing the DISCORD_BOT_USER_TOKEN with the previously saved Token that we received after creating a new bot user in the discord website.
var discordChannel = new DiscordChannel(oscovaBot,"DISCORD_BOT_USER_TOKEN");
discordChannel.Start();
Overall Code
Your overall code should now look something similar to the following.
using System;
using System.IO;
using Syn.Bot.Channels.Common;
using Syn.Bot.Channels.Discord;
using Syn.Bot.Channels.Testing;
using Syn.Bot.Oscova;

namespace DiscordChannelSample
{
    class Program
    {
        static void Main(string[] args)
        {
            var oscovaBot = new OscovaBot();

            oscovaBot.Dialogs.Add(new ChannelTestDialog());
            oscovaBot.Trainer.StartTraining();

            var discordChannel = new DiscordChannel<OscovaBot>(oscovaBot,"DISCORD_BOT_USER_TOKEN");
            discordChannel.Start();

            Console.WriteLine("Your Oscova Bot is now hosted as a Discord Bot. Press any key to exit.");
            Console.ReadKey();

            discordChannel.Stop();
        }
    }
}
Running the Bot
- Run the project by clicking on the Start button in Visual Studio.
- Launch Discord App in mobile or desktop.
- Add your Bot as a friend by typing in the Bot name.
- Type Help and you will get a list of commands you can type to test your bot.
Congratulations! You have now created your first Discord Bot powered by Syn Bot framework.