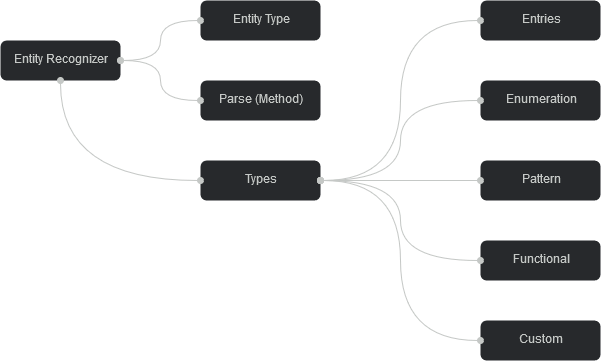
Entity Recognizers
Oscova supports multiple ways of rapidly creating entity recognizers. Developers can create entity recognizers for known words, patterns via regular expressions or even by providing methods that extract entities from request.
By default all entity recognizers created in Oscova using CreateRecognizer() method are case-insensitive. Developers can also explicitly specify if entity recognition must be case-sensitive for a given recognizer during its creation.
Entries Recognizer
For list of known words (entries) developer can easily create an Entity Recognizer by calling the CreateRecognizer method, specifying the EntityType parsed by the entity recognizer and an array of known entry values.
Note
Each entry in an Entry Recognizer must be alphanumeric.
var bot = new OscovaBot();
bot.CreateRecognizer("employee", new[] { "Sean", "Ali", "Patel" });
The above code creates an Entity Recognizer for the type employee. If any of specified entry is found in user request and Entity of type employee will get added to the result.
Important
Any entity recognizer created by calling the OscovaBot.CreateRecognizer function gets automatically added to the Bot's Recognizers collection. You do not have to manually add the created recognizer instance to the recognizers collection of the bot.
You can also create an Entries Recognizer by creating an empty entries recognizer and later adding entry values as shown value.
var recognizer = bot.CreateRecognizer("employee");
recognizer.Entries.Add("Sean");
recognizer.Entries.Add("Ali");
recognizer.Entries.Add("Patel");
All entry based entity recognizers are greedy. For example, if you have an entry gray and another entry dark gray. If the user message contains Dark Gray the entity recognizer will return one entity with value dark gray.
Case-Sensitive Entries Recognizer
You can create a case-sensitive entries recognizer by specifying a StringComparer as shown below.
var bot = new OscovaBot();
bot.CreateRecognizer("employee", new[] { "Sean", "Ahmet", "Patel" }, StringComparer.Ordinal);
Enumeration Recognizer
Developers can also create Entity Recognizers for enum types.
enum PriorityTypes
{
    Low,
    High,
    Mininum,
    Maxinum
}
var bot = new OscovaBot();
bot.CreateRecognizer<PriorityTypes>("priority");
In the above code we pass the type PriorityTypes and specify entity type name for the new entry based recognizer. All enum values Low, High, Minimum and Maximum will be treated as entry values.
Case-Sensitive Enumeration Recognizer
To create a case-sensitive enumeration recognizer you can specify a StringComparer as shown below.
var bot = new OscovaBot();
bot.CreateRecognizer<PriorityTypes>("priority", StringComparer.Ordinal);
Developers can also specify entry synonyms by decorating an enum value with the Synonyms attribute as shown below.
enum PriorityTypes
{
    Low,
    High,

    [Synonyms("Min")]
    Minimum,

    [Synonyms("Max")]
    Maximum
}
As synonyms have been added the entity recognizer will now consider the words Min and Max when parsing a request. The entity recognizer will also link the enum value and synonyms during entity creation. This allows developers to fetch the value of the created entity as an enum type.
var entity = result.Entities.OfType("priority");
var priority = entity.ValueAs<PriorityTypes>();
The value of the variable priority will be PriorityTypes.Minimum if entity.Value is Min or Minimum.
Fuzzy matching in Entry Recognizer
Both entry and enumeration based entity recognition is backed by the EntryRecognizer. By default the matchin is done in sequence and as a whole. After entries have been added to a recognizer you can call the MakeFuzzy() method on the Entries collection to create all possible permutations of the values added.
For example the permutation of the phrase big red truck are:
- big
- big truck
- truck big
- red truck
- truck red
- big red truck
- big truck red
- red big truck
- red truck big
- truck big red
- truck red big
To create such permutations in the entries recognizer you can do the following:
var bot = new OscovaBot();
var recognizer = bot.CreateRecognizer("fuzzy-entity");

recognizer.Entries.Add("truck");
recognizer.Entries.Add("red truck");
recognizer.Entries.Add("big truck");
recognizer.Entries.Add("big red truck");

recognizer.Entries.MakeFuzzy(bot);
Pattern Recognizer
You can create a regular expression based entity recognizer by specifying the entity type and passing in the Regex instance.
var regex = new Regex("[0-9a-fA-F]+[\r\n]*");
bot.CreateRecognizer("hex", regex);
In the above code we've created an entity recognizer for hexadecimal numbers. Whenever the pattern is matched in user message an Entity of type hex gets created.
Functional Recognizer
A functional recognizer can be created by specifying an entity type and a method that returns EntityCollection after parsing the user message.
bot.CreateRecognizer("name", request =>
{
    var entities = new EntityCollection();
    var message = request.NormalizedText;
    foreach (var item in SomeValues)
    {
        var index = message.IndexOf(item, StringComparison.OrdinalIgnoreCase);
        if (index == -1) continue;
        var entity = new Entity("name")
        {
            Value = item,
            Index = index
        };
        entities.Add(entity);
    }
    return entities;
});
Recognizers created by this method are extremely handy in situations when the developer doesn't want the Bot to load known entries into memory. Functional Recognizer is recommended for recognizing entities from Database.
Custom Recognizer
A custom entity recognizer can also be built from scratch by implementing the IEntityRecognizer interface available under the Syn.Bot.Oscova.Interfaces namespace.
For example, in the code below we create an entity recognizer that recognizes HTML content in user input.
Custom HTML entity
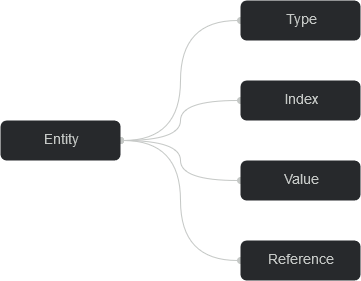
public class HtmlEntity : IEntity
{
    public HtmlEntity() { Type = "html"; }
    public string Type { get; set; }
    public string Value { get; set; }
    public int Index { get; set; }
}
Custom IEntityRecognizer implementation
public class HtmlRecognizer : IEntityRecognizer
{
    public string Type => "html";
    public EntityCollection Parse(Request request)
    {
        var regex = new Regex(@"<(?<tag>\w*)>(?<text>.*)</\k<tag>>");
        var entities = new EntityCollection();
        foreach (Match match in regex.Matches(request.NormalizedText))
        {
            var entity = new HtmlEntity
            {
                Value = match.Value,
                Index = match.Index
            };
            entities.Add(entity);
        }
        return entities;
    }
}
The above HTML entity recognizer uses a regular expression to match HTML tags in user input. After a match is found the recognizer creates a new entity of type html using the class HtmlEntity.
Important
All entities must specify an Index value. That denotes the starting index of the matched content in user input.
After a custom entity recognizer is created, add it to the OscovaBot.Recognizers collection before training is initiated.
Entity Examples
When creating custom non-entry based entity recognizers, developers can optionally specify Example terms or phrases to help the internal Machine Learning process. For this, when declaring an IEntityRecognizer implementation, the class can be decorated with the EntityExampleAttribute attribute. The attribute takes a set of example terms or phrases that the internal Training system checks before initiating a ML based training process.
Using the above HTML Recognizer Example, the following shows how to specify examples on Non-Entry based recognizers.
Example 1
[EntityExample("hypertext_markup_language", "hypertext", "markup")]
public class HtmlRecognizer : IEntityRecognizer
{
    public string Type => "html";
    public EntityCollection Parse(Request request)
    {
        //RETURN SOMETHING....
    }
}
Example 2
[EntityExample("employee_id", "identifier","employee_identification","identity")]
public class EmployeeCodeRecognizer : BaseRegexRecognizer
{
    public EmployeeCodeRecognizer() : base(Sys.UsPostalCode)
    {
        Regex = new Regex(@"^[A-Z\d]{1}[A-Z\d._/\-]{49}$");
    }

    public override Regex Regex { get; }
    public override IEntity CreateEntity(Match match)
    {
        return new EmployeeCodeEntity("EmployeeId", match.Value, match.Index);
    }
}
When training the bot training system will look through the entity examples while creating the entity type recognizer and pass them to the machine learning engine.
To add phrases with space characters between words, use the _ (underscore) character to separate individual words as shown in the examples above.
Note
Entry based entity recognizers do not require the EntityExampleAttribute as Oscova automatically scans through the entries for machine learning.