Create a Unity Bot in C# with OSCOVA
In this tutorial we will learn to import Syn.Bot Unity Package and create a bot within the Unity platform. As Oscova provides consistent development across experience all platforms we will not need to re-invent anything here. We can create Dialogs as we usually would create for any other project and we can even import SIML and Workspace files likewise.
This tutorial is based on Unity version 2019.3.4f1. You can download the latest version of Unity from the link below:
Resources
Creating a Unity Project
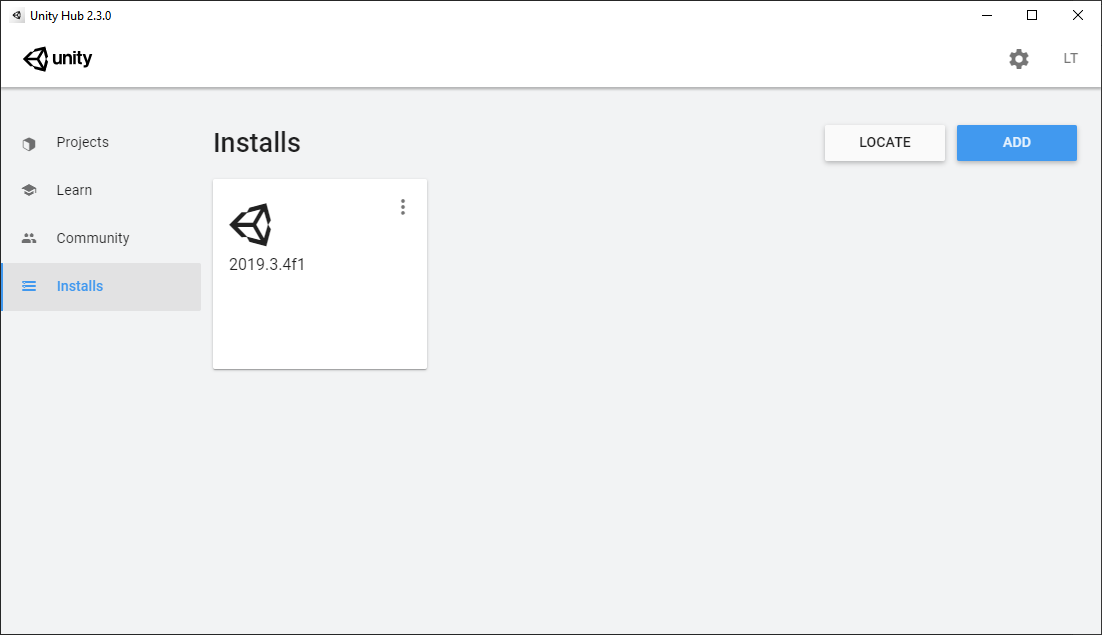
Ensure that you download Unity Hub. And let's start assuming that you've already downloaded and installed unity. The screenshot below shows the version of Unity installed on our machine during the course of writing this tutorial.
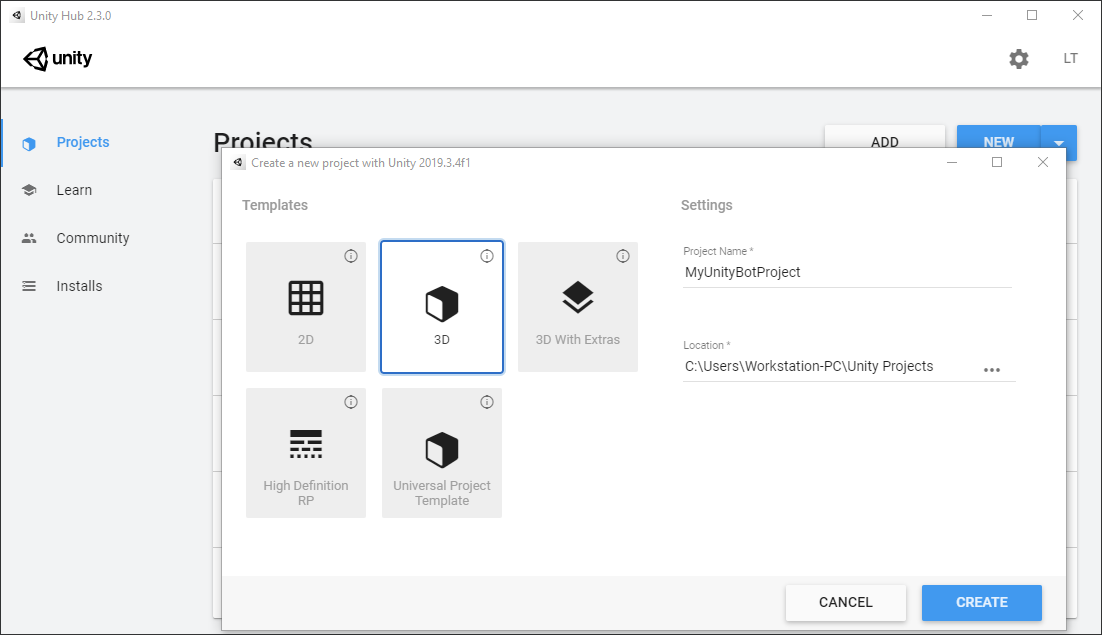
- Select
Projectand chooseNew - Select
3Dand name your projectMyUnityBotProject - Click on
Create
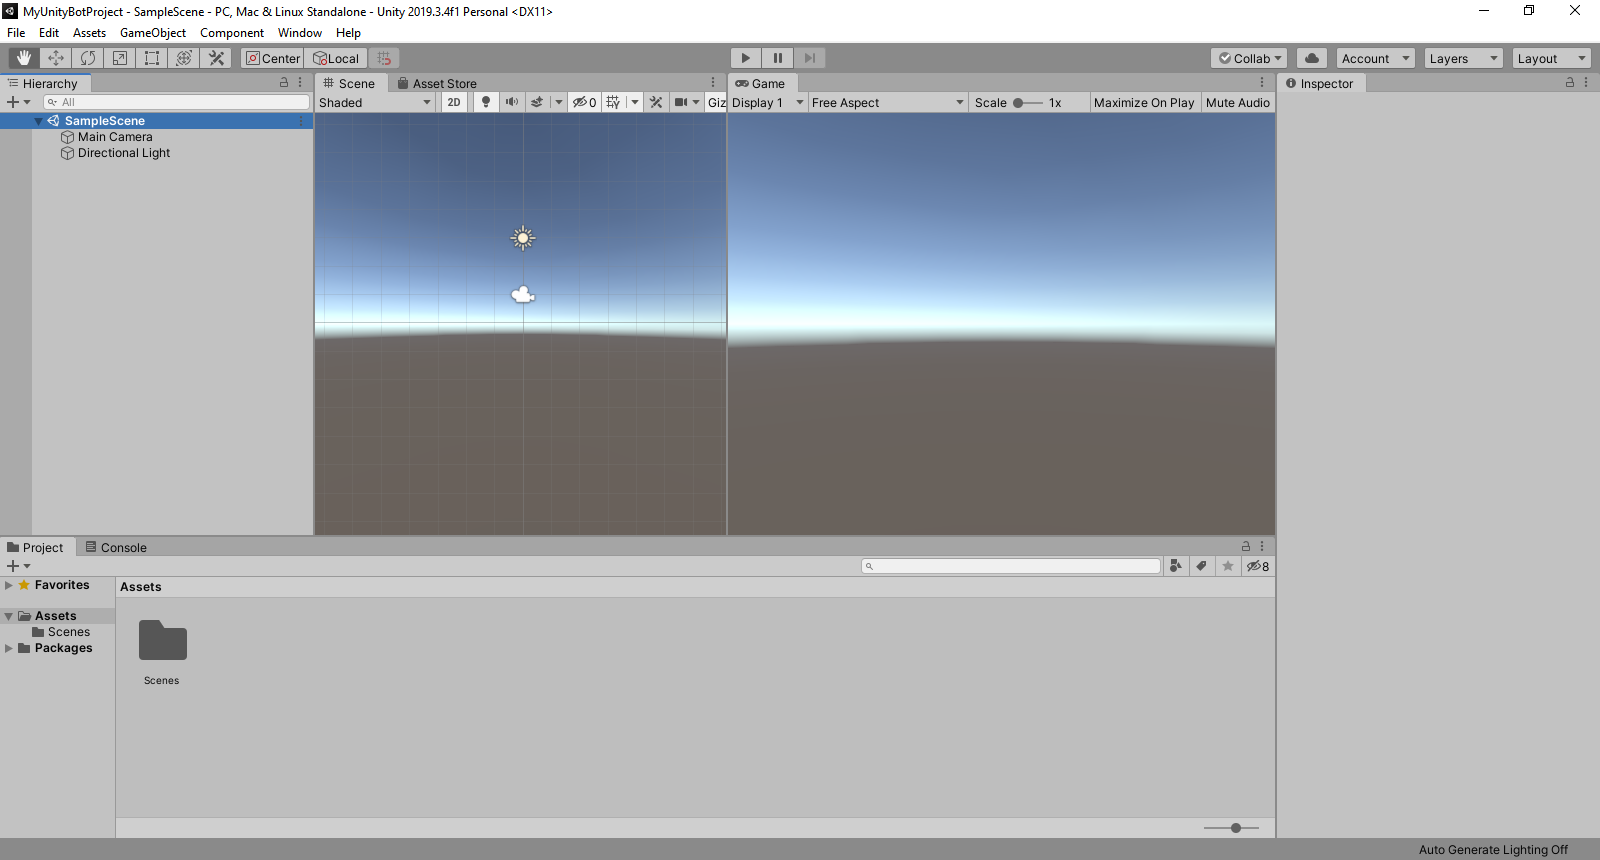
Your Unity project should now be created and the Unity studio should now be visible as follows:
Setting up the Chat UI
Your project is now ready. We will now add a couple of visual elements to create a chat interface within Unity.
Canvas
Let's add a Canvas and then a Scroll View. This will contain the chats between the user and the bot.
:video videos/create-canvas-scroll.mp4
We'll now change a few configuration of the Content element of the Viewport so that the text that will be added into the viewport content aligns properly. We'll do so by adding a Content Size Filter and Vertical Layout Group component.
:video videos/unity-adjust-content.mp4
When you type a message to the bot and a response is generated by the bot we will need to save those text values within the Content of the Viewport. For that text to be visible and aligned within the viewport we will now create a Text prefab.
:video videos/unity-content-text.mp4
Input Field
To talk to the bot we will need to add a text Input Field which will take the user input and pass to the bot for processing.
- Add a
Input Fieldto theCanvasUI element and place it below theScroll Viewas shown below.
:video videos/unity-input-field.mp4
Button
Finally our Chat UI will now contain a Send Button to send the user message to the bot for processing.
- Right click and select
UI - Choose
Button
Adjust the button placement as shown below.
:video videos/unity-send-button.mp4
We are now done with the UI part of our Unity bot.
Importing Syn.Bot Unity Package.
If you have not downloaded the Syn.Bot Demo Unity Package you can download the package from the link below.
In your unity project right click in Project
- Choose Import Package and select Custom Package...
- Select the
Syn.Bot.unitypackagefile that you've downloaded - Make sure all items are selected and choose Import
:video videos/unity-import-bot.mp4
Bot Interface
We have now successfully created the UI part and have imported the Syn.Bot Unity Package to the Unity project. In order to create our bot and bind it with the UI we will go ahead and create a GameManager that will have a Script component attached to it.
- Right click on
Scene Hierarchyand selectCreate Empty - Rename the game object to
GameManager - Click on
Add Componentin Inspector window - Add a
Scriptand name itGameManager
:video videos/unity-game-manager.mp4
Double click on the GameManager script Project Assets window. This should open a Visual Studio project.
The current code should look something like the following.
using System.Collections;
using System.Collections.Generic;
using UnityEngine;

public class GameManager : MonoBehaviour
{
    // Start is called before the first frame update
    void Start()
    {

    }

    // Update is called once per frame
    void Update()
    {

    }
}
Above the GameManager class code add the following code. In the code below we create a Message class that will hold information like the user or bot message, message type and the associated Text UI object.
using Syn.Bot.Oscova;
using Syn.Bot.Oscova.Attributes;
using System;
using System.Collections.Generic;
using UnityEngine;
using UnityEngine.UI;

public class Message
{
    public string Text;
    public Text TextObject;
    public MessageType MessageType;
}

public enum MessageType
{
    User, Bot
}

public class GameManager : MonoBehaviour
{
    // Start is called before the first frame update
    void Start()
    {

    }

    // Update is called once per frame
    void Update()
    {

    }
}
We'll now add a couple of fields to the code to connect Content of viewport, Text prefab, Input Field and the send Button.
In the GameManager class add the following fields before the void Start() method.
OscovaBot MainBot;

List<Message> Messages = new List<Message>();

public GameObject chatPanel, textObject;
public InputField chatBox;
public Color UserColor, BotColor;
As in Unity the public fields can be assigned visually, we will now go back to our unity project by closing the Visual Studio project and focusing on Unity.
:video videos/unity-attach-game-manager.mp4
Add Message to Panel
Next we'll add a AddMessage() method to the script that will add Text object instances to the Content element of the Viewport with the user or bot's text message and will also control the number of Text objects in memory.
public void AddMessage(string messageText, MessageType messageType)
{
    if (Messages.Count >= 25)
    {
        //Remove when too much.
        Destroy(Messages[0].TextObject.gameObject);
        Messages.Remove(Messages[0]);
    }

    var newMessage = new Message { Text = messageText };

    var newText = Instantiate(textObject, chatPanel.transform);

    newMessage.TextObject = newText.GetComponent<Text>();
    newMessage.TextObject.text = messageText;
    newMessage.TextObject.color = messageType == MessageType.User ? UserColor : BotColor;

    Messages.Add(newMessage);
}
In the code above if the message count is more than 25 the first object is removed from memory.
After that we create a new Message object, attach the user or bot message, instantiate a new Text prefab object the reference of which is stored in the textObject object and finally add it to the Messages list.
In the code above the line newMessage.TextObject.color = messageType == MessageType.User ? UserColor : BotColor; selects a text color for the object based on the message type. This would be green for user messages and blue for bot messages.
Process User Message
When the user message is received. We will process the user message via the bot and let the bot's ResponseReceived control how messages are added on the screen.
For this we will create a SendMessageToBot() method will be utilized by our Send Button and also by our Input Field when a Return key is pressed.
Add the following code just below the AddMessage() method.
public void SendMessageToBot()
{
    var userMessage = chatBox.text;

    if (!string.IsNullOrEmpty(userMessage))
    {
        Debug.Log($"OscovaBot:[USER] {userMessage}");
        AddMessage($"User: {userMessage}", MessageType.User);
        var request = MainBot.MainUser.CreateRequest(userMessage);
        var evaluationResult = MainBot.Evaluate(request);
        evaluationResult.Invoke();

        chatBox.Select();
        chatBox.text = "";
    }
}
In the code above we get the Input Field text value. We check if the value is not empty or null and then pass the information to the bot to generate a response. After the user message is processed we set the Input Field text value to an empty string.
Send Button Event
Since the SendMessageToBot() method has to be called when the Send Button is clicked or tapped we will add the method to the click event in Inspector
:video videos/unity-button-event.mp4
Input Field (On Enter)
To process a user message (or call the SendMessageToBot() method) when the user presses Enter on the Input Field we will change the Update() method to the following.
// Update is called once per frame
void Update()
{
    if (Input.GetKeyDown(KeyCode.Return))
    {
        SendMessageToBot();
    }
}
Bot Dialog
To keep the tutorial simple we will now create a simple BotDialog class that will inherit the Dialog class and will have just a single Hello() intent.
public class BotDialog: Dialog
{
    [Expression("Hello Bot")]
    public void Hello(Context context, Result result)
    {
        result.SendResponse("Hello User!");
    }
}
In the code above we've created a new Oscova dialog that will respond Hello User! whenever the user says Hello Bot.
Start Oscova
We will now update the the Start() to create a new instance of OscovaBot.
// Start is called before the first frame update
void Start()
{
    try
    {
        MainBot = new OscovaBot();
        OscovaBot.Logger.LogReceived += (s, o) =>
        {
            Debug.Log($"OscovaBot: {o.Log}");
        };

        MainBot.Dialogs.Add(new BotDialog());
        MainBot.Trainer.StartTraining();

        MainBot.MainUser.ResponseReceived += (sender, evt) =>
        {
            AddMessage($"Bot: {evt.Response.Text}", MessageType.Bot);
        };
    }
    catch (Exception ex)
    {
        Debug.LogError(ex);
    }
}
In the code above we create a new instance of OscovaBot. Later we ensure that logs from the bot is redirected to Unity debugger. We then add the previous created BotDialog to the bot's Dialogs collection and start the training process.
Whenever the bot generates a response it will be passed to the AddMessage() to create and display the text in the viewport.
You can now save and close the project in Visual Studio and switch to Unity.
Final Code
The overall code in the GameManager script file should look something like the following by now.
using Syn.Bot.Oscova;
using Syn.Bot.Oscova.Attributes;
using System;
using System.Collections.Generic;
using UnityEngine;
using UnityEngine.UI;

public class Message
{
    public string Text;
    public Text TextObject;
    public MessageType MessageType;
}

public enum MessageType
{
    User, Bot
}

public class BotDialog: Dialog
{
    [Expression("Hello Bot")]
    public void Hello(Context context, Result result)
    {
        result.SendResponse("Hello User!");
    }
}

public class GameManager : MonoBehaviour
{
    OscovaBot MainBot;

    public GameObject chatPanel, textObject;
    public InputField chatBox;

    public Color UserColor, BotColor;

    List<Message> Messages = new List<Message>();

    // Start is called before the first frame update
    void Start()
    {
        try
        {
            MainBot = new OscovaBot();
            OscovaBot.Logger.LogReceived += (s, o) =>
            {
                Debug.Log($"OscovaBot: {o.Log}");
            };

            MainBot.Dialogs.Add(new BotDialog());
            //Knowledge.json file referenced without extension.
            //Workspace file extensions must be changed from .west to .json
            //var txtAsset = (TextAsset)Resources.Load("knowledge", typeof(TextAsset));
            //var tileFile = txtAsset.text;
            //MainBot.ImportWorkspace("tileFile");
            MainBot.Trainer.StartTraining();

            MainBot.MainUser.ResponseReceived += (sender, evt) =>
            {
                AddMessage($"Bot: {evt.Response.Text}", MessageType.Bot);
            };
        }
        catch (Exception ex)
        {
            Debug.LogError(ex);
        }
    }

    public void AddMessage(string messageText, MessageType messageType)
    {
        if (Messages.Count >= 25)
        {
            //Remove when too much.
            Destroy(Messages[0].TextObject.gameObject);
            Messages.Remove(Messages[0]);
        }

        var newMessage = new Message { Text = messageText };

        var newText = Instantiate(textObject, chatPanel.transform);

        newMessage.TextObject = newText.GetComponent<Text>();
        newMessage.TextObject.text = messageText;
        newMessage.TextObject.color = messageType == MessageType.User ? UserColor : BotColor;

        Messages.Add(newMessage);
    }

    public void SendMessageToBot()
    {
        var userMessage = chatBox.text;

        if (!string.IsNullOrEmpty(userMessage))
        {
            Debug.Log($"OscovaBot:[USER] {userMessage}");
            AddMessage($"User: {userMessage}", MessageType.User);
            var request = MainBot.MainUser.CreateRequest(userMessage);
            var evaluationResult = MainBot.Evaluate(request);
            evaluationResult.Invoke();

            chatBox.Select();
            chatBox.text = "";
        }
    }

    // Update is called once per frame
    void Update()
    {
        if (Input.GetKeyDown(KeyCode.Return))
        {
            SendMessageToBot();
        }
    }
}
Testing the Bot
Switch to Unity and select the Game tab. Press the play button on the top and type Hello in the Input Field. You will see the response Hello User! from the bot.
:video videos/unity-test.mp4
Importing Knowledge-base
You can also add SIML and Workspace files into your Unity project and import them into OscovaBot. For this you can follow the steps below.
- Rename the file extension from
.westor.simlto.json - Drag the renamed
WorkspaceorSIMLfile on toProject Assetswindow. - Refer to the path as
workspaceFileorsimlFilewithout extension.
Unity Asset Store Package
Syn Bot Framework's official Unity package is available in Unity Asset Store.