Creating a custom Adapter
Apart from all the SIML elements you can add your own custom Element to the SIML interpreter. A custom element should have a unique name and may or may not return a value.
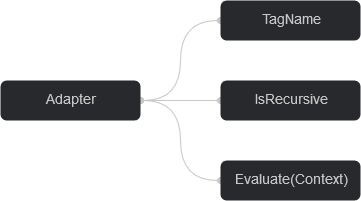
Adapters – Tag handlers
All SIML tag handlers implement the interface IAdapter. This interface provides the simplest set of properties and functions a tag handler should have to interact with the GraphMaster.
Example of a Custom tag handler
public class CustomAdapter : IAdapter
{
    public XName TagName { get { return "Custom"; } }
    public bool IsRecursive { get { return true; } }
    public string Evaluate(Context parameter)
    {
        var customElement = parameter.Element;
        var value = customElement.Value;
        //Do some processing
        return value;
    }
}
In the example code above the TagName property is the case-sensitive name of your custom tag. . The property IsRecursive tells the interpreter that the children elements of this element can be processed prior to calling the Evaluate method. Finally the function Evaluate is the main function that will be called once the inner elements have been evaluated or skipped if the IsRecursive property is set to false.
Working with Namespaces
Because large bots will definitely be making use of Custom Adapters there can arise a situation where 2 or more adapters may share the same name. To avoid such conflicts all adapter names are XName objects. This allows developers to group their adapter names with relevant namespaces.
<Siml>
  <Concept Name="Some new Concept" Type="Public" xmlns:example="http://example.com/namespace#example">
    <Model>
      <Pattern>EXECUTE CUSTOM COMMAND</Pattern>
      <Response>
        <example:Custom>Run</example:Custom>
      </Response>
    </Model>
  </Concept>
</Siml>
In the above SIML code we create a new namespace example using xmlns:prefix=”URI“ format. The URI in the above example is http://example.com/namespace#example
Later we prefix our Custom element with the example: namespace. This is a perfectly valid example of using Namespaces in SIML. But how will our Adapter look like in Code ? It will look something like the following.
public class CustomAdapter : IAdapter
{
    public bool IsRecursive { get { return true; } }
    public XName TagName
    {
        get
        {
            XNamespace ns = "http://example.com/namespace#example";
            return ns + "Custom";
        }
    }
    public string Evaluate(Context parameter)
    {
        //Do Something
        return string.Empty;
    }
}
Adding an Adapter
Once you’ve created an Adapter you should add it to the Adapters list of the Bot as shown below.
simlBot.Adapters.Add(new CustomAdapter());
Note
You should add an Adapter once during initialization. Duplicate adapter entries are not allowed by the interpreter.
Interacting with a Custom adapter
An added adapter can be used at run-time via SIML flawlessly. The output of the Adapter generated, after the Evaluate method is called, will get embedded within an SIML response.
An example usage of the above Custom Adapter
<Model>
  <Pattern>GET THE LOCATION OF *</Pattern>
  <Response>The location is <x:Custom><Match /></x:Custom></Response>
</Model>